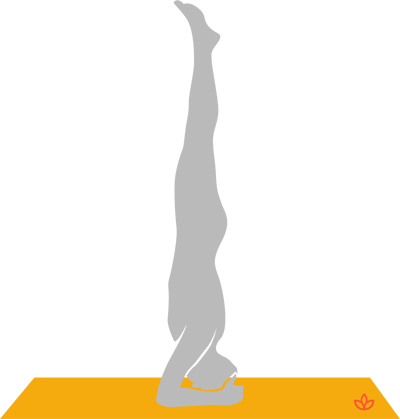
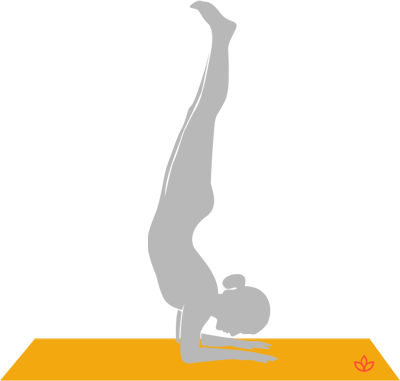
They call headstand the king of asana, however, it may just be that handstand takes the cake as one of the most coveted and awe-inspiring asana.
Headstand is, of course, an essential introductory step on the journey to handstand and it’s here that many will begin to overcome the regular fears that come along with learning inversions.
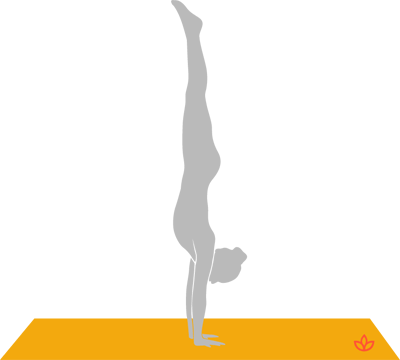
In Sanskrit, the handstand is called adho mukha vrksasana, which translates to downward-facing tree pose. This references turning the roots of your feet upside down, toward the sky!
Why We Think the Handstand Is So Incredible
- It’s a display of strength and balance.
- It shows mastery over the body and mind, being in the present moment. This reflects the word yoga, which means "to join."
- It opens up a new range of postures in an inverted shape that requires more skill & balance (such as backbends or splits)
- They just plain look cool and let’s face it, as humans, we are attracted to things that simply look amazing.
Ask yourself why you want to learn a handstand and what benefit it will add to your practice. Allow it to be a form of svadhyaya or self-inquiry. It is definitely an advanced posture, not to be taken lightly. However, there are ways to make it more accessible to a range of practitioners.
Remember, learning to do a handstand or having a handstand practice is certainly not essential to any yoga practice. Sometimes it may even be shamed by the explosion in the popularity of yoga photos on Instagram that one may think it’s too over-the-top.
Read: How Instagram is Changing the Way We View Yoga
It’s true— wherever you are at in your practice, you never need to push yourself, and going to extremes is not the answer, whether it’s doing a handstand or a backbend. It’s about the choice— is this a natural progression for your practice and are you ready for the challenge?
Handstands Can Teach You More than Simply Balancing on Your Hands
One of my handstand teachers once said,
“Handstands are not for people who don’t like failure.”
I can attest that this holds true. You will try, fail, and try again to experience those precious moments of balance upside-down on your hands.
Learning how to handstand teaches you to look at the pose each time you fail and analyze what went wrong so the next time you can improve it. This may be looking at your alignment, conditioning your body for more strength, or working on your flexibility.
Yes, flexibility is also important for handstands— it’s not just a strength pose— it requires body awareness, basic strength and range of motion, as well as the two keys: balance and alignment.
You may look at handstands and think “that requires so much strength!” Yes, that is true, a basic level of strength is certainly required. However, if you want to learn how to perform handstands, the best practice is actually to do handstands and exercises that support them— not pumping iron at the gym.
Are You Ready for Handstands?
Here’s a checklist to see if you are ready to balance on your hands:
- You can perform chaturanga with proper alignment & endurance

- You practice jump backs or jump throughs in surya namaskar or ashtanga vinyasa
- You are ready to welcome a new challenge into your practice
- You are free of wrist and shoulder pain or injury
Read: 7 Ways to Prevent Wrist Injury in Yoga
The Best Handstand Practices
Don’t wear yourself out beforehand. Yes, give yourself a warm-up, but if you do a million pushups (or chaturangas!) you may find your muscles more tired for your practice.
Do warm up your wrists! Your hands are a small part of the body with small surface area, full of tiny little delicate bones. You are asking a lot of them to carry the weight of your body when you handstand! So, shake ‘em out, roll them, and give them a good stretch before weight-bearing!
Do learn how to fall out of a handstand properly. Cartwheel to the side with one leg rather than falling into a backbend (ie. wheel pose).
Do use the wall. The wall is your friend! Make peace with is. Even the most advanced handstand practitioners will still use the wall for drills. Start there and learn to incorporate it into different aspects of your practice.
Pros & Cons of Handstand
Handstands may be a great option to learn inversions for those who may have neck issues and cannot perform a headstand. However, the engagement of the hands and shoulders is quite different, so it can lead to wrist or shoulder issues if not managed properly. Generally, it is much safer to fall out of a handstand than a headstand because there is no weight on the head, so the neck is not compromised.
Read: 10 Benefits of Inversions
Alignment Tips
Let’s review the fundamentals of how to perform a straight-line handstand. This technique is essential to learn before moving onto other variations.
In the beginning, some people find it easier to balance in a counterbalance position, where the legs are split. While this is a valid option, learning the straight line will make it easier to transition and is more relevant to a vinyasa flow practice that you can incorporate into surya namaskar.
Two of the most important tips for handstands are to elevate the shoulder blades UP toward the ears and to tuck the pelvis under into what is known as a posterior pelvic tilt.
When you look at human anatomy, when the arms raise above the ears, the scapula, or shoulder blades, naturally rise up to the ears. You want to emphasize this movement with a pushing action through the arms whenever you do a handstand.
Additionally, the posterior pelvic tilt is the opposite of anterior pelvic tilt. While in a straight-line handstand, you want to tuck the tailbone under and draw the pubic toward the navel. This contracts the lower abdomen for strong core engagement.
In the beginning, most people look like a banana in the handstand position because they are in an anterior pelvic tilt. In this position, the tailbone is pointed back, which arches the lower back and releases the abs, so there is little core engagement.
A great exercise to work on your posterior pelvic tilt is called the hollow body. To perform this, lay down on your back and imprint the lower back into the floor by tucking the tailbone.
Glue your legs together and lift them off the mat. Extend the arms alongside the ears and lift the arms and head off the floor. Keep the legs as low to the floor as you can with your lower back and rib cage glued to the mat.
Read: How to Prep for Inversions
Some other important pointers include:
- Place the hands directly under the shoulders. Make sure they are not too wide.
- Spread the fingers out.
- Lock the elbows! Arms must be straight.
- Look down at your thumbs.
- Keep the legs straight and glued completely together with pointed toes. Lock the knees. This is another overlooked aspect of handstands. If the legs and feet are not engaged, they will literally weigh you down, gravity will take over, and you may fall over.
How to Start Out Practicing Handstands
1. Practice Down Dog Hops
These are super fun to incorporate into any practice, including a vinyasa flow! Start in downward dog, bend the knees, and look forward.
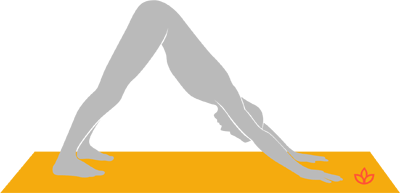
Hop by springing off your back legs so the hips stack over the head. No need to straighten the legs, keep them in a tucked position. Land back in your downward dog with the knees bent to soften the landing. Repeat!
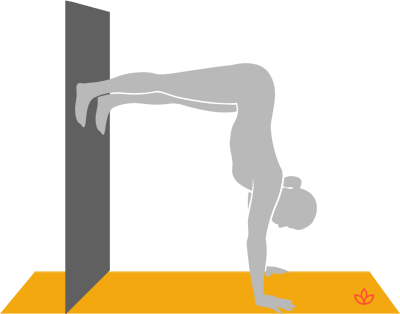
2. Kick Up to the Wall
Now, you are ready to try the wall! Position your hands slightly away from the wall and decide which leg you want to kick up with. You may need to try a few times to see which leg you prefer.
The legs are set up similar to a standing split position, with one leg forward and one leg up in the air. While the leg in the air does not need to be lifted high like in a standing split, some hamstring and hip flexor flexibility is required for this position.
It’s also important to keep the leg in the air straight with the toe pointed right from the start. Set yourself up for success! Then, to kick up, simply bend the standing the leg and use momentum to spring up. The wall will catch you!
From there, you can try to find your balance and use the wall as feedback. It’s great to film yourself when practicing so you can check your alignment, see what’s working and what’s not working.
3. The L-Shape Handstand (Half Handstand)
If the kick up doesn’t work, there is an option for you, too, don’t worry! Simply sit with your back against the wall and legs extended out like in dandasana (staff pose). Fold forward and place your hands next to your ankles. Keep your hands there as a placeholder, fold your knees and walk your feet halfway up the wall until the hips stack over the head. Keep the body in an L-shape, so the feet only go in line with your hips.
From here, you can experiment with taking one leg off at a time to find your line and balance.
To Advance Your Handstand
There are so many options and ways to advance your handstand practice!
- Practice in the center of the room.
- Walk your hands all the back to the wall from the L-shape handstand for a belly against the wall handstand.
- Time yourself- see how long you go, or aim for 30 seconds or a full minute at the wall.
- Eventually, you can work towards press handstands where you effortlessly glide the legs up from a straddle or pike position without jumping.
Read: 5 Gorgeous Yoga Poses and What You Can Learn From Them
Just as anything in life, learning to handstand is a great life lesson you can apply anywhere, any time. Failure is a great teacher.
Handstands can teach you to look at any situation or mistake in your life under a new lens, a new perspective. You can make note of what worked and what you did wrong so that you can try again and do it even better next time.
While the handstand will not make you any more enlightened, the journey to get there can shed light on different aspects of yourself in a new way. In the end, it’s about the process and not the pose itself.
Let the journey be a reflection of who you are and remember not to be attached to the results!
During These Times of Stress and Uncertainty Your Doshas May Be Unbalanced.
To help you bring attention to your doshas and to identify what your predominant dosha is, we created the following quiz.
Try not to stress over every question, but simply answer based off your intuition. After all, you know yourself better than anyone else.